


 I applied the leopard skin texture to the model and using the gizmo tool on the UVW modifier i move the texture to look more real, but setting the mapping to box. Very please with the outcome of the leopard.
 The leopard skin texture
 Once satisfied with the leopards head i attached it to the the body and welded the head to the neck. The neck required alot of shaping but once i hade recreated a few polygons and moved a few the head seemed to sit buitifully. Looking at other picture of leopards i realised the tale i had created for the leopard was too big and using the scale tool i decresed its size and width.
 Once the head was moved out i worked on the planes around the side and the back of the head compleating the 3D Head. I found this to be very difficult but once i had got this right i was very pleased with the result.
 I started to move the planes out making the head more 3D, once i was satisfied i extruded out the ears and shaped them to the image.
 I maked out a rough outline of the head on paint and created the rest of the flat face using planes. I made half of the face and use the symetry tool to make things quicker and easier in the development.
 I decided i did not like how the head was on the model and i delete it from the model. I decided to start the head a fresh as a seperate model using planes and working from a guidence image. I started with the planes around the eye and using the edge tool and holing shift, i created new planes from the plane.
 I used the connect tool around the edges of the paws and created extra lines. i moved every other one back into the paw to give the look of four toes on the paw.
 The legs that had been extruded before i felt where too wipe and i used the scale tool in order to make them thiner and more realistic.
 I pulled the vertexs of the head around to get a reasonable shape and the beveled the ears out at the back of the head.
 I used the bevel to to create the base of the heand and then beveled the head back in to create the tip of the head.
 Once the legs where exturded out i extruded out the neck and the tail of the leopard. The tail in the image i was looking at was very long and wide.
 Once the body was shaped i extruded out the legs from the bottom of the body and then extruded out the shape of the feet from the legs.
 I started the Leopard by creating a box and shaping it to the shape of the body, using the help of the tutorial. I used a mixture of the scaling tool and the move tool to create this.

 I placed what colours i felt the dolphin would have. I had to compare my image regualry with the UVW in max to ensure i had the colour on the body exactly where i wished it to be. Once My texture was completed i applied it to the dolphin, added a turbosmooth mofifier and the dolphin model was complete.
 Using the Unwrap UVW modifier i modified the mapping to my liking and created a textue in photoshop for my dolphin.
 Creating the eye was done in a similar way to the creationg of the blow hole. once i had the polygon for the eye positioned where i wanted it, i used the inset tool and delete the polygon within that. And in the same way as the blow hole i held down the shift key and moved the eye in. The sphere was added as an eye for the dolphin. Once the eye was complete the dolphin was ready for texturing.
 The blow hole was created by connecting edges together on the top of the dolthin, Once i was happy with the position of the blow hole i deleted the polygon, selecting the endges of the hole and creating new polygons going down by holding shift.
 The nose if the dolphin was then extruded out to match the shape shown on the side image, this was done by once again using the scale tool.
 The front fins where then extruded out and shaped as to the bottom image.
 Once i had shaped the dolphin, i selected the polygons on one half of the model and deleted them. i then attached a symerty modifier to the dolphin. I used the extude tool to create the dorsal fin and the tail fin. Shaping them by selcting the veticies and moving them to match the bottom image.

 For the top veiw in 3ds max i used this image to aid in the width of the dolphin and the shape of the tail fin.
 For Guidence with the left veiw port of 3ds max i used this image to get the height and positioning of the different characteristics of the dolphin.


 I decided i liked the way the stinger turned out and i decided to keep the texture as it was. For the rest of the wasp i used unwrap UVW modifier on the different pieces to my model.
 This was the finished outcome after the Unwrapping was finished ready for texturing.

 I applied the texture to the stinger, and used the UVW made modifier to arange it. I used the cylindrical property and made it so the cylinder wrapped around the stings and i manipulaed the map until i was satisfied with the result.

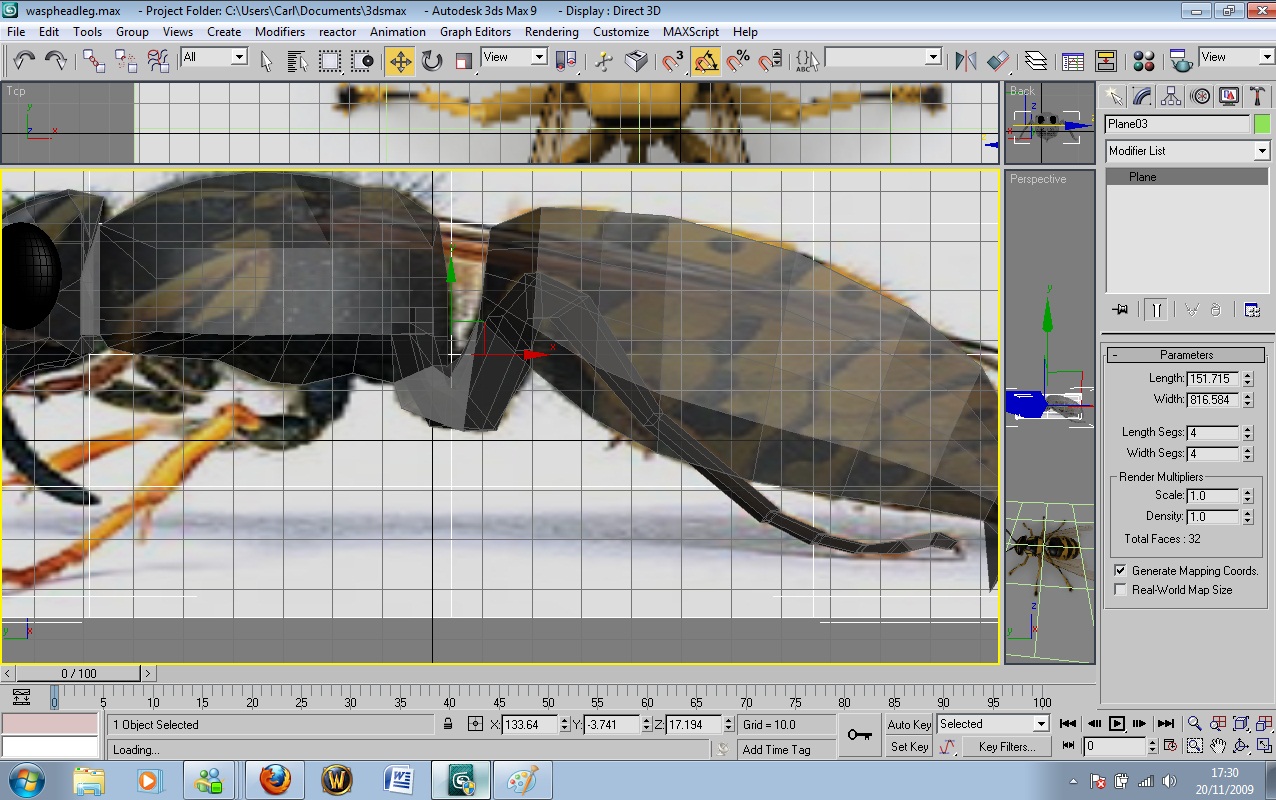 Using the guidence of the backing image i extruden out the legs of the wasp and shaped them, i found after doing this once i became very familier with the toold that max has and i found the other 2 legs and the anteni much simpler. The toold i got used to the most making the legs where the inset and the bevel tool, the 2 tools where very handy in the creation of the legs.
 Using the face image i shaped the face of the wasp. Once i had the face to my desire i created to spheres for the eyes, and shaped these with the scale tool and placed them.

 Once the Stinger had been extruded out i shape the stinger by moving the verticiers to match the out line of the wasps stinger in the picture. i dide this for both the left veiw and the top view.
 Once i had finished extuding out the head i used the side view port in order to shape the head and the body to more of a wasp shape. I used the see through option in the object properties to make this process easier as i could see the wasp from benieth. Whilst in the view port i began work on the stinger by extruding out of the back of the body and moving the vertex's to create the jointh between the body and the stinger.


